 By
By 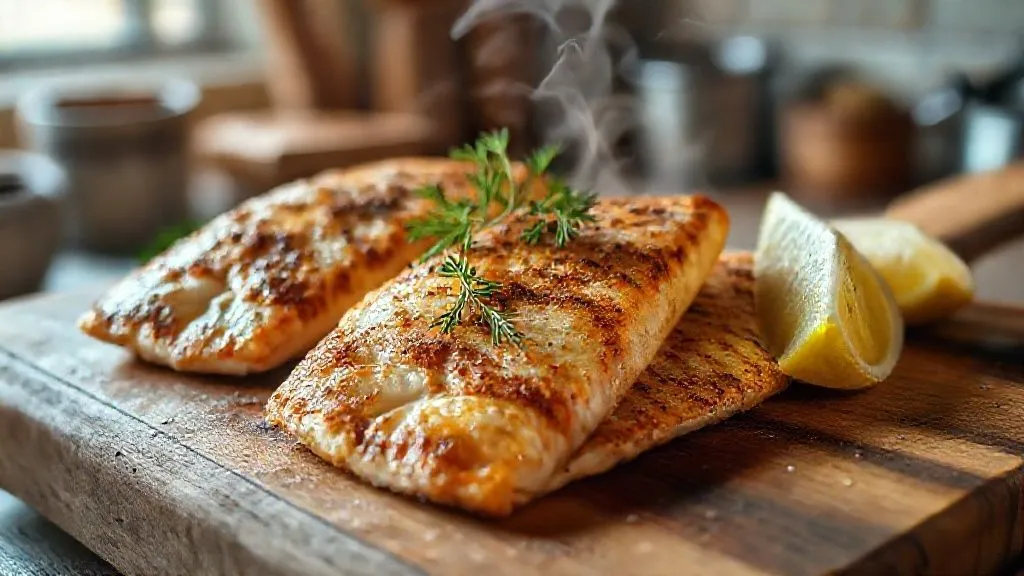
How to Perfectly Pan Sear Multiple Fish Fillets at Once?
For over two decades in professional kitchens and culinary education, I've seen countless home cooks and even some seasoned chefs grapple with a seemingly simple task: pan-searing fish. It's an art, a delicate balance of heat and timing, but the real challenge often surfaces when you try to scale it up. The moment you introduce more than one or two fillets to the pan, things can quickly go sideways.
The common pitfalls are all too familiar: some fillets are perfectly golden and flaky, while others are pale and undercooked; the skin that should be crisp turns rubbery; or the entire batch ends up steaming rather than searing, leaving you with a disappointing, soggy mess. It’s frustrating when you’re trying to feed a family or guests, and your beautiful fish turns into a culinary compromise.
But what if I told you there's a methodical approach, a set of principles honed over years of trial and error, that allows you to perfectly pan sear multiple fish fillets at once, consistently delivering that restaurant-quality crust and succulent interior? In this definitive guide, I’ll share my expert insights, actionable frameworks, and the precise techniques that will transform your multi-fillet searing from a gamble into a guaranteed success.
Understanding the 'Why': The Science of Searing and Heat Management
Before we dive into the 'how,' it's crucial to understand the 'why.' Pan-searing isn't just about cooking fish; it's about creating a specific chemical reaction on the surface: the Maillard reaction. This reaction, responsible for the delicious browning and complex flavors in many cooked foods, requires high heat and a dry surface.
When you overcrowd a pan, you introduce too much moisture (from the fish itself) and dramatically lower the pan's surface temperature. This causes the fish to steam in its own juices rather than sear. The result? No crispy skin, no rich brown crust, and an unappetizing texture.
"The Maillard reaction is your best friend in the kitchen. Understand its needs – high heat and dry conditions – and you unlock a world of flavor and texture that steaming simply cannot provide."
Effective heat management is the cornerstone of successful multi-fillet searing. It's not just about turning up the burner; it's about maintaining a consistent, high temperature across the entire cooking surface, even when multiple pieces of cold fish are introduced. This often means preheating your pan longer than you think necessary and being strategic about how you add your ingredients.
The Unsung Heroes: Pan Choice and Heat Distribution
Your pan is your primary tool, and selecting the right one is non-negotiable for searing multiple fillets effectively. Not all pans are created equal, especially when it comes to heat retention and even distribution.
- Cast Iron: My absolute top recommendation. Cast iron retains heat exceptionally well, meaning its temperature won't drop drastically when you add cold fish. It also distributes heat evenly, minimizing hot spots.
- Stainless Steel (Heavy-Bottomed): A close second. Look for multi-ply construction (e.g., tri-ply) with an aluminum or copper core sandwiched between stainless steel layers. This provides good heat conductivity and retention.
- Non-Stick: While convenient for delicate fish, non-stick pans often have thinner bottoms and poorer heat retention. They can also degrade at the high temperatures required for proper searing. If you must use one, ensure it's a heavy-gauge, quality pan.
For searing multiple fillets, size matters. You need a pan large enough to accommodate all your fillets without crowding them, allowing at least an inch or two of space between each piece. A 12-inch or 14-inch skillet is usually ideal for 3-4 medium-sized fillets. Don't underestimate the power of a good, heavy pan.

Fillet Selection & Preparation: Consistency is Key
Achieving even cooking across multiple fillets starts long before they hit the pan. The consistency of your fish fillets is paramount.
Selecting Your Fillets: Uniformity is Your Friend
When purchasing, try to select fillets that are roughly the same thickness and size. If you have varying thicknesses, you'll inevitably end up with some pieces overcooked and others undercooked. If necessary, you can gently pound thicker parts of a fillet with the flat side of a meat mallet or the palm of your hand to achieve more uniform thickness, being careful not to damage the delicate flesh.
Bringing to Temperature: The Room Temp Advantage
Never sear fish straight from the refrigerator. Cold fish will drastically lower your pan's temperature and lead to uneven cooking. Allow your fillets to sit at room temperature for 15-20 minutes before searing. This slight warming helps them cook more evenly and prevents thermal shock to the pan.
Pre-Searing Rituals: Drying, Seasoning, and Oil
These crucial steps are often overlooked but are absolutely vital for a perfect sear.
- Pat, Pat, Pat Dry: This is perhaps the single most important step. Moisture is the enemy of searing. Use paper towels to thoroughly pat every surface of your fish fillets dry. Pay extra attention to the skin side. You want them as dry as possible. Repeat this process right before they go into the pan.
- Season Generously: Once dry, season your fish liberally with salt and freshly cracked black pepper. For skin-on fish, season the flesh side first, then the skin side. The salt will help draw out a little more surface moisture, which is a good thing.
- Choose the Right Oil: You need an oil with a high smoke point. My go-to choices are grapeseed oil, canola oil, avocado oil, or refined sunflower oil. Olive oil, especially extra virgin, has a lower smoke point and will smoke and burn before your pan reaches searing temperature.
- Oil the Fish, Not the Pan (Initially): I prefer to lightly brush the seasoned fish fillets with oil rather than pouring oil directly into the pan. This ensures an even, thin coating and prevents excess oil from smoking excessively.
The Art of Spacing: Why Less is More (Sometimes)
This is where many cooks falter when attempting to pan sear multiple fish fillets at once. Overcrowding is the death knell of crispy skin and even cooking.
As I mentioned, adding too much cold fish at once drops the pan's temperature, leading to steaming. If you can't fit all your fillets in a single layer with ample space around each one (at least 1-2 inches), then you absolutely must work in batches. Yes, it takes a little longer, but the quality difference is monumental.
Case Study: The Restaurant Rush vs. The Home Cook
I once consulted for a bustling seafood restaurant that struggled with consistent fish searing during peak hours. Their line cooks were trying to push too many fillets through a single pan to keep up with orders. The result was inconsistent quality and frustrated customers. By implementing a strict 'no more than three fillets per 14-inch pan' rule and adding an extra searing station, they saw an immediate improvement in quality, reduced waste from poorly cooked fish, and ultimately, happier diners. This seemingly small operational change significantly boosted their reputation for perfectly cooked seafood.
Mastering the Flip: Timing and Technique
The flip is a moment of truth. Resist the urge to peek or move the fish constantly. Patience is key.
- Preheat Your Pan: Heat your pan over medium-high to high heat until it's smoking lightly. If you brushed oil on the fish, you might add a tiny bit more oil to the pan if it looks too dry. The pan should be hot enough that a drop of water evaporates instantly.
- Place Fillets Carefully: Gently lay each fillet into the hot pan, away from you, starting with the skin side down (if applicable). Ensure even spacing. The sizzle should be immediate and pronounced.
- Hands Off! (For a While): Once the fish is in, do not touch it for the first 3-5 minutes, depending on thickness and desired crispness. This allows the crust to form without tearing. The fish will naturally release from the pan when it's ready to flip. If it sticks, it's not ready.
- Observe the Cook Line: For skin-on fish, watch the sides of the fillet. You'll see the opaque cooked flesh creeping up from the bottom. When it's about two-thirds of the way up the fillet, it's usually time to flip.
- The Confident Flip: Using a thin, sturdy metal spatula, slide it under the fillet and flip with a decisive, confident motion. Sear the second side until cooked through, typically 2-4 minutes more.
Temperature Control: The Dance of Heat and Time
Maintaining the right temperature is a delicate dance. Too low, and you steam; too high, and you burn the exterior before the interior cooks.
Start with medium-high to high heat to get that initial sear. Once the fish is in, you might need to slightly reduce the heat to medium to prevent burning, especially if your pan is retaining a lot of heat (like cast iron). The goal is a consistent, vigorous sizzle, not a frantic smoke show.
Cooking times will vary based on the type and thickness of your fish. A general rule of thumb is 8-10 minutes per inch of thickness for most white fish. However, visual cues are often more reliable than strict timings. The fish should flake easily with a fork at its thickest point, and the flesh should be opaque throughout.
| Fish Type | Thickness (approx) | Searing Time (skin side) | Searing Time (flesh side) | Internal Temp (medium) |
|---|---|---|---|---|
| Salmon (skin-on) | 1 inch | 4-6 min | 2-4 min | 125-130°F |
| Cod/Halibut (skinless) | 1 inch | 4-5 min | 3-4 min | 135-140°F |
| Snapper/Branzino (skin-on) | 0.75 inch | 3-5 min | 2-3 min | 135-140°F |
Finishing Touches: Basting, Resting, and Serving
These final steps elevate your pan-seared fish from good to truly exceptional.
- Basting (Optional but Recommended): Towards the end of cooking, especially on the second side, you can add a knob of butter, a sprig of fresh herbs (thyme, rosemary), and a crushed garlic clove to the pan. Tilt the pan slightly and use a spoon to baste the melting butter and aromatics over the fish. This adds incredible flavor and a beautiful sheen.
- Don't Overcook: Fish continues to cook for a minute or two after being removed from the heat (carryover cooking). Remove it just before it's perfectly done to prevent it from drying out.
- Rest Your Fish: Just like meat, fish benefits from a brief rest. Transfer the seared fillets to a wire rack set over a baking sheet (to keep the skin crispy) or a warm plate. Let them rest for 2-3 minutes. This allows the juices to redistribute, resulting in a more succulent and tender final product.
- Serve Immediately: While resting is important, pan-seared fish, especially with crispy skin, is best enjoyed right away.
According to culinary science, the resting period is crucial for muscle fibers to relax and reabsorb moisture, preventing a dry, tough texture. This is a principle that applies across many proteins, not just fish. For more on this, you can explore resources like Serious Eats' Food Lab which often delves into the science behind cooking techniques.
Troubleshooting Common Multi-Fillet Searing Mistakes
Even with the best intentions, things can go wrong. Here's how to address common issues:
- Soggy Skin: Almost always due to overcrowding, insufficient pan heat, or not drying the fish thoroughly enough. Revisit your pan spacing and pre-searing prep.
- Uneven Cooking: Likely due to uneven fillet thickness, cold fish, or hot spots in your pan. Ensure fillets are uniform, brought to room temp, and use a heavy-bottomed pan.
- Fish Sticking to the Pan: The pan wasn't hot enough when the fish was added, or you tried to flip it too soon. Let the crust develop fully – it will release naturally. A well-seasoned cast iron pan also helps.
- Smoky Kitchen: While some smoke is normal for high-heat searing, excessive smoke usually means your oil is past its smoke point, or there's too much residual oil/butter burning in the pan. Use high smoke point oils and wipe out excess if necessary between batches.
As renowned chef Gordon Ramsay often emphasizes, "Respect the ingredients." This means giving your fish the conditions it needs to shine, rather than forcing it into a crowded, suboptimal environment. You can find many of his practical tips and recipes on platforms like Gordon Ramsay's official website.
Frequently Asked Questions (FAQ)
Q: Can I use different types of fish in the same pan when searing multiple fillets? A: While technically possible, I strongly advise against it if you're aiming for perfection. Different fish types have varying thicknesses, fat content, and cooking times. Searing them simultaneously will almost certainly lead to some being overcooked or undercooked. Stick to one type of fish per batch for consistent results. If you must, ensure they are of similar thickness and monitor them individually, removing each as it's done.
Q: What's the best way to get super crispy skin on salmon or snapper? A: The secret is a combination of extreme dryness, high heat, and patience. Pat the skin aggressively dry with paper towels, then season. Preheat your heavy-bottomed pan until it's very hot, add a high smoke point oil, and place the fish skin-side down. Press gently with a spatula for the first 30 seconds to ensure full skin contact. Do not move or flip until the skin is deeply golden brown and very crisp, typically 4-6 minutes for salmon. The skin should release effortlessly when ready.
Q: How do I prevent my delicate fish fillets, like sole or tilapia, from breaking apart when flipping? A: Delicate fish require a very thin, wide metal spatula, and a confident, swift flip. Ensure the fish has developed a good crust and has naturally released from the pan before attempting to flip. You can also use two spatulas, one on each side, for extra support if you're nervous. Cooking them to about 80% done on the first side can also help firm them up before the flip.
Q: Should I add butter at the beginning or end of searing? A: For the initial sear, stick to high smoke point oils. Butter has a lower smoke point and its milk solids can burn, imparting a bitter flavor, especially at the high temperatures needed for a good crust. I recommend adding butter towards the very end of cooking, perhaps during the last minute or two, for basting and flavor infusion. This way, you get the rich butter flavor without compromising your sear or burning the fat.
Q: What if I only have a small pan and need to cook a lot of fish? A: You absolutely must work in batches. Trying to squeeze too many fillets into a small pan is the primary cause of poor searing. Cook 1-2 fillets at a time, transfer them to a wire rack set over a baking sheet in a warm oven (around 200°F / 95°C) to keep them warm while you sear the remaining batches. This ensures each fillet gets the attention and space it needs for a perfect sear, even if it means a little more time. For more general cooking wisdom, consider exploring resources from institutions like The Culinary Institute of America.
Key Takeaways and Final Thoughts
Mastering the art of pan-searing multiple fish fillets at once is about understanding fundamental culinary principles and executing them with precision and patience. It's not magic; it's method.
- Preparation is Paramount: Dry fish, uniform thickness, and room temperature are non-negotiable.
- Pan Choice Matters: Invest in a heavy-bottomed, heat-retentive pan like cast iron or quality stainless steel.
- Space is Sacred: Never, ever overcrowd the pan. Work in batches if necessary.
- Heat Control is Key: Maintain consistent medium-high to high heat for searing, adjusting as needed.
- Patience Pays Off: Let the crust develop before flipping; the fish will tell you when it's ready.
I’ve seen the transformation in countless students and home cooks who apply these techniques. The shift from struggling with soggy fish to confidently serving perfectly seared, crispy-skinned fillets to a hungry crowd is incredibly rewarding. Embrace these expert strategies, practice them, and you’ll soon find yourself creating restaurant-quality seafood right in your own kitchen, effortlessly and consistently, no matter how many fillets you're cooking.
Recommended Reading
- The Secret to Flawless Vegan Meringue Peaks: A Master Guide
- 5 Expert Hacks: Craft Unique, Robust Slow Cooker Broth Without Bitterness
- 7 Proven Ways: Attract Parents via Kids' Kitchen Safety Protocols
- Scale Quick One-Pot Meals for Catering: 5 Pro Strategies for Profit
- 7 Natural Ways: Extend Quick Bread Shelf Life for Commercial Sale

0 Comentários: