 By
By 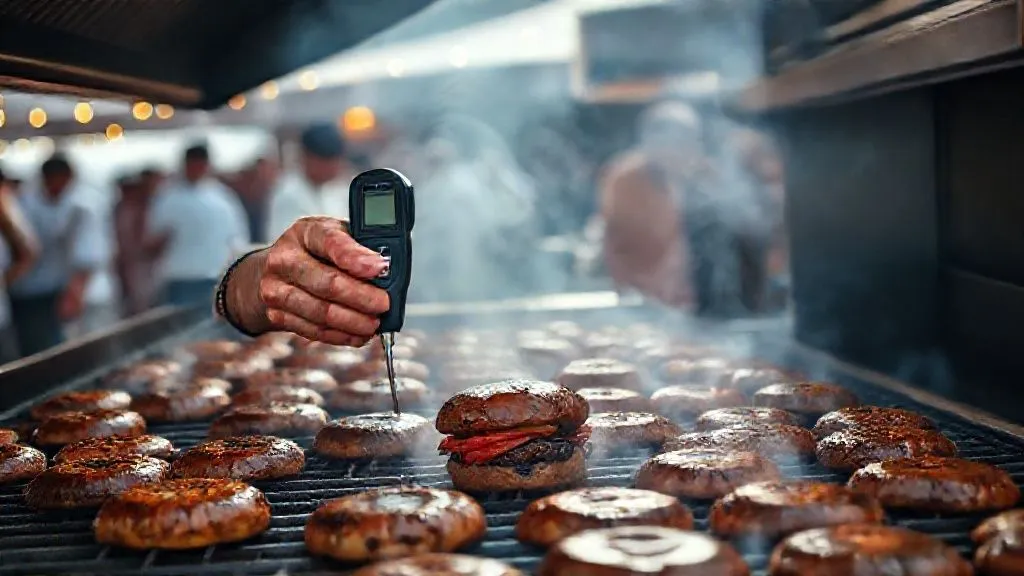
How to Consistently Achieve Perfect Medium-Rare on 50+ Burgers?
For over three decades on the grill, I’ve witnessed the triumphant highs and devastating lows of large-scale burger cookouts. There’s nothing quite like the collective groan when a host, proud of their grilling prowess, cuts into a burger meant for a guest, only to find it either raw in the middle or a sad, gray puck. The dream of perfectly cooked, juicy medium-rare burgers for everyone often crumbles under the pressure of volume.
The sheer logistics of managing 50 or more burgers simultaneously can turn even the most seasoned backyard hero into a frantic flipper, sacrificing precision for pace. You’re battling uneven heat, varying patty thicknesses, and the relentless clock, all while trying to maintain that elusive pink center. It’s a common pitfall, and one I’ve helped countless aspiring grill masters overcome.
But what if I told you there’s a systematic, repeatable framework to not just manage, but master this challenge? This isn't about guesswork or luck; it’s about applying battle-tested strategies, smart tools, and a veteran's mindset. In this guide, I’ll share the exact methodologies I’ve honed over years of catering gigs and massive family gatherings, ensuring you can confidently achieve perfect medium-rare on 50+ burgers, every single time.
Mastering the Burger Patty: Foundation for Consistency
Before any flame touches meat, consistency begins with your patty. This is where most large-scale burger operations falter right out of the gate. An uneven patty cooks unevenly, simple as that. You can have the best grill, the fanciest thermometer, and all the tricks in the book, but if your foundation is weak, your medium-rare dream will crumble.
Uniformity is Key: Weight, Thickness, and the Dimple
Every single burger patty must be identical in weight and thickness. I typically aim for 6-ounce patties, which cook beautifully to medium-rare without drying out too quickly. For thickness, shoot for about 3/4 inch. If you’re hand-forming, a kitchen scale is your best friend. Weigh each portion of ground beef before you even start shaping. Then, use a burger press for consistent form, or develop a consistent hand-forming technique, ensuring the edges aren't too thin. Crucially, don't forget the dimple. Press a shallow indentation into the center of one side of each patty with your thumb. This prevents the burger from puffing up into a ball, keeping it flat and ensuring even cooking.
Optimal Fat Content and Grind
The type of ground beef you choose significantly impacts texture and juiciness. For a truly great burger, especially when aiming for medium-rare, you need fat. I always recommend an 80/20 lean-to-fat ratio (80% lean, 20% fat). This provides enough moisture and flavor without being overly greasy. As for the grind, a coarser grind offers better texture. Avoid overly fine grinds, which can result in a dense, paste-like burger. If you have a butcher, ask for freshly ground chuck.
- Weigh and Divide: Start by accurately weighing out 6-ounce portions of 80/20 ground chuck.
- Gentle Handling: Handle the meat as little as possible to prevent compaction, which leads to tough burgers.
- Form Evenly: Use a burger press or your hands to form patties to 3/4 inch thickness.
- Create the Dimple: Press a shallow dimple into the center of one side of each patty.
- Pre-Chill: Arrange formed patties on baking sheets lined with parchment paper and refrigerate them for at least 30 minutes, or even better, an hour. This helps them hold their shape and prevents them from falling apart on the grill.
“The secret to a consistently perfect burger begins long before it hits the grill. It's in the meticulous preparation of each patty, ensuring every single one is a clone of the last.”
Temperature Control: The Griller's Thermometer Bible
If you're grilling for a crowd, your eyes and intuition simply aren't enough to guarantee doneness. Relying on visual cues alone for 50+ burgers is a recipe for inconsistency. This is where your thermometer becomes your most trusted ally, your grilling bible, ensuring every burger hits that perfect medium-rare sweet spot.
Why Thermometers are Non-Negotiable for Volume Grilling
When cooking one or two burgers, you might get away with a 'squeeze test' or a quick peek. But when you have dozens on the grates, each with its own micro-climate, you need objective data. A thermometer eliminates guesswork, reduces stress, and most importantly, guarantees food safety while delivering precise doneness. For medium-rare, we're aiming for an internal temperature range. I pull my burgers off the grill when they hit 125-130°F (52-54°C), knowing that carryover cooking will bring them up to the ideal 130-135°F (54-57°C) during resting.
Types of Thermometers: Your Arsenal for Precision
You'll need more than just one type of thermometer for high-volume grilling:
- Instant-Read Digital Thermometer: This is your primary tool. It provides quick, accurate readings in 2-3 seconds. Crucial for spot-checking individual burgers. Brands like ThermoWorks (Thermapen) are industry standards for a reason.
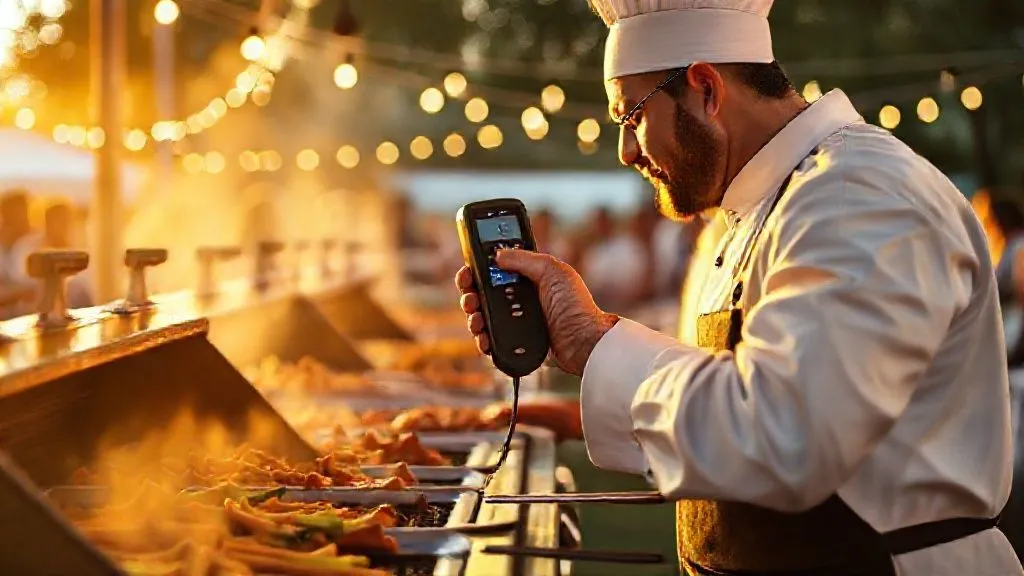
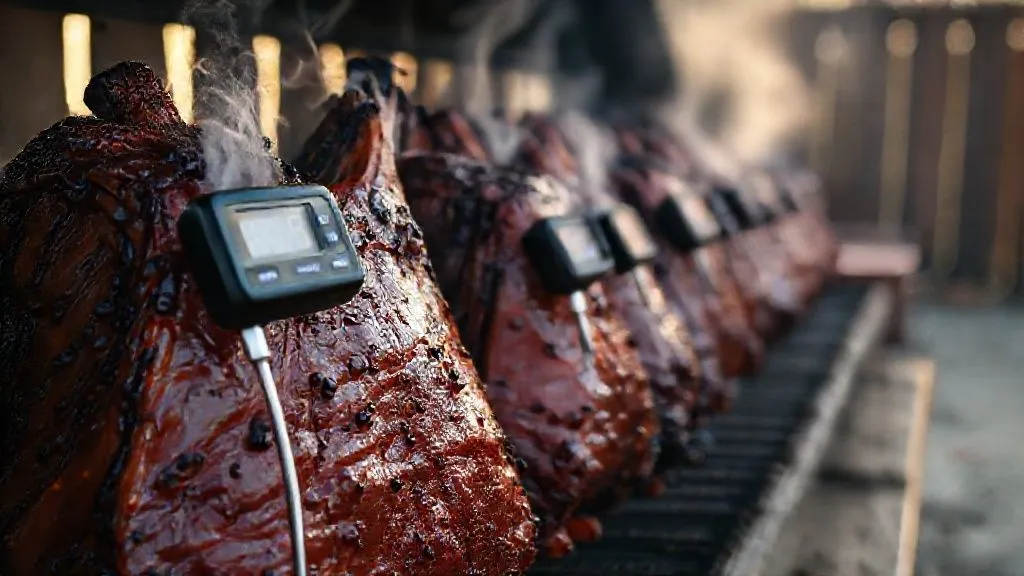
- Multi-Probe Remote Thermometer: For larger batches, these are invaluable. You can insert multiple probes into different burgers across your grill, monitor temperatures remotely, and get alerts when they hit your target. This allows you to track several burgers simultaneously without constantly opening the grill lid.
- Grill Surface Thermometer: While not for meat, a good grill surface thermometer helps you understand the hot and cool spots on your grates, informing your grill zone strategy.
- Calibrate Regularly: Ensure your thermometers are accurate. I check mine weekly in ice water (should read 32°F / 0°C) and boiling water (should read 212°F / 100°C at sea level).
- Probe from the Side: When checking a burger, insert the probe horizontally into the thickest part of the patty, avoiding the center that might be cooler or hotter due to the dimple, and ensuring it doesn't poke through the other side.
- Check Multiple Burgers: Don't assume one burger's temperature is indicative of all. Spot-check at least 20-30% of your batch, especially those in different grill zones.

Grill Zone Strategy: Heat Management for the Masses
Grilling 50+ burgers isn't just about putting meat on heat; it's about orchestrating a symphony of temperatures across your cooking surface. A single, uniform heat setting is your enemy. You need distinct zones to achieve that beautiful sear while gently bringing the interior to medium-rare. This is the cornerstone of high-volume, consistent grilling.
Two-Zone Grilling for High Volume
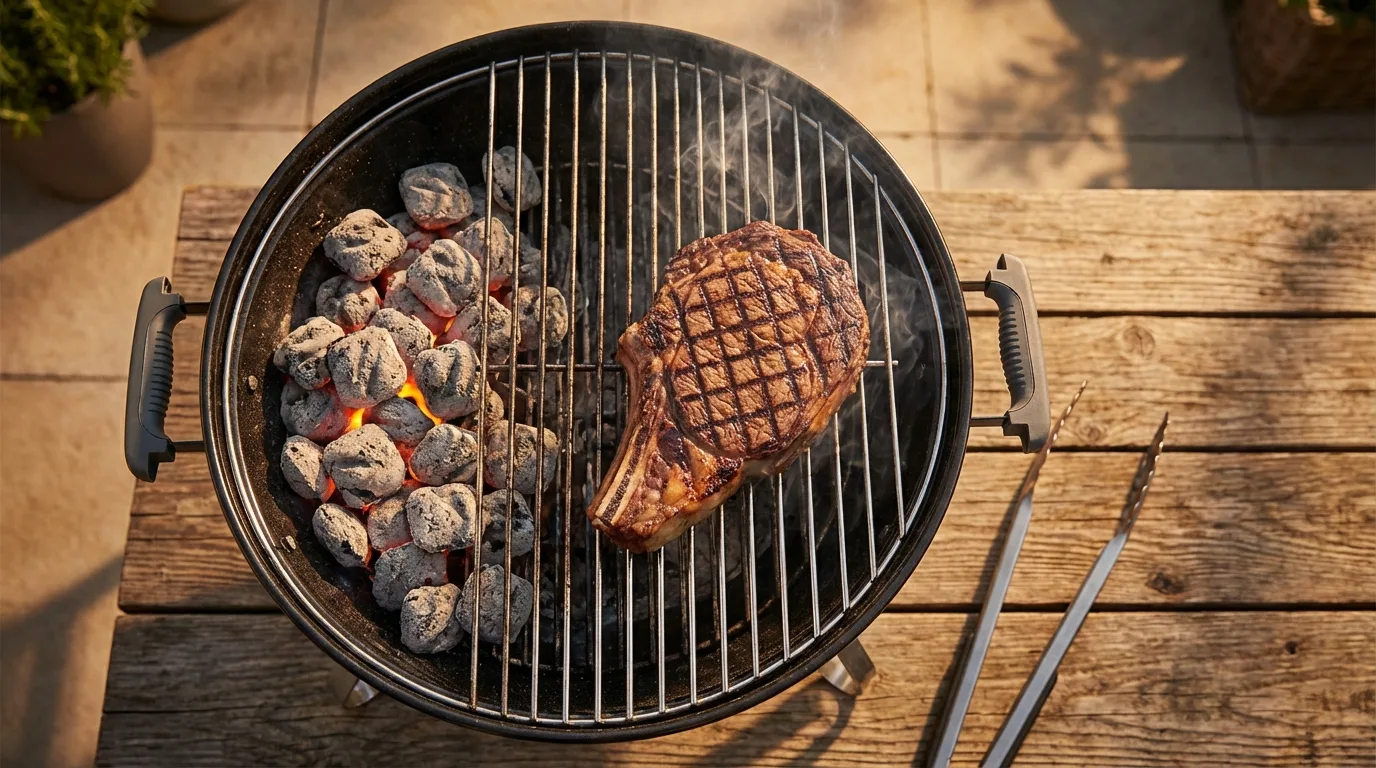
Whether you're using gas or charcoal, the principle is the same: create a direct heat zone and an indirect heat zone. The direct zone, set to high heat, is for searing and developing that delicious crust. The indirect zone, set to medium-low, is where burgers finish cooking gently, allowing internal temperatures to rise without overcooking the exterior. For large grills, you might even have a medium-direct zone in between.
The Searing and Resting Zones
Think of your grill as an assembly line. Burgers start in the high-heat searing zone for a couple of minutes per side, developing flavor and texture. Then, they move to the indirect zone to slowly cook through. This prevents charring the outside while the inside struggles to catch up. For gas grills, this means turning off burners on one side. For charcoal, it means banking coals to one side and leaving the other side empty.
- Preheat Aggressively: Get your grill screaming hot, especially the direct zone. I aim for 500-600°F (260-315°C) for the initial sear.
- Clean and Oil Grates: Always start with clean, oiled grates to prevent sticking, which is disastrous when flipping dozens of burgers.
- Utilize Space: Don't overcrowd the direct heat zone. Work in batches for searing, then transfer to the indirect zone. This maintains grill temperature and allows proper air circulation.
- Monitor Zone Temps: Use your grill's built-in thermometer or a separate surface thermometer to understand your hot and cool spots.
“Your grill is not a single, monolithic cooking surface. It's a landscape of diverse thermal environments. Mastering these zones is how you control the destiny of every single burger.”
The Flip & Rotate Discipline: A System for Even Cooking
When dealing with 50+ burgers, a haphazard flipping strategy will lead to chaos and inconsistent results. You need a system, a disciplined approach to flipping and rotating that ensures every patty gets equal attention and even heat exposure. Forget the 'one-flip' myth; strategic turning is your friend here.
The Single Flip Myth vs. Strategic Turning
The idea of a single flip comes from a place of good intention – not wanting to mess with the sear. However, for volume cooking, and often for any burger, multiple strategic flips (every 1-2 minutes) can actually lead to faster, more even cooking and a better crust. As Harold McGee, the renowned food scientist, explains, flipping frequently keeps the outer layers from overheating and speeds up the cooking process by continuously exposing both sides to fresh heat. This is especially true when you're moving burgers between zones.
Mapping Your Grill Surface for Rotation
Your grill isn't perfectly uniform. You'll have hotter spots and cooler spots. The key is to understand your grill's topography and use it to your advantage. Mentally (or even physically, with chalk if on a concrete surface) divide your grill into sections. As burgers move from searing to finishing, they should also rotate within those finishing zones to account for slight temperature variations.
- Initial Sear: Place patties on the hottest direct heat zone. Sear for 1.5-2 minutes per side. Work in batches if necessary to avoid overcrowding.
- Transfer to Indirect: Once seared, move burgers to the indirect heat zone. This is where the majority of the cooking will happen.
- Systematic Rotation: Every 2-3 minutes, flip the burgers in the indirect zone. If you have multiple rows, rotate them. For example, move the back row to the front, and the front row to the back. This ensures even exposure to residual heat and prevents any single burger from lingering in a slightly hotter or cooler spot.
- Probe and Pull: Begin checking internal temperatures with your instant-read thermometer once burgers approach 120°F (49°C). Pull them at 125-130°F (52-54°C).
Case Study: The Annual Community BBQ Challenge
The 'Annual Community BBQ Challenge' faced a notorious problem: 100+ burgers, but only 20% were consistently medium-rare. Grill masters were overwhelmed, flipping randomly. By implementing my two-zone system and a strict 'flip-and-rotate' discipline, they transformed their process. They assigned one person to searing, another to managing the indirect zone (flipping and rotating every 2 minutes), and a third dedicated to temperature checks and pulling. This resulted in an astounding 90% medium-rare success rate, significantly reducing complaints and improving guest satisfaction. It showcased the power of systemizing the grill workflow.
| Time (Minutes) | Zone | Action |
|---|---|---|
| 0-2 | Direct High Heat | Sear Side 1 |
| 2-4 | Direct High Heat | Sear Side 2 |
| 4-6 | Indirect Medium-Low | Flip & Rotate Batch 1 |
| 6-8 | Indirect Medium-Low | Flip & Rotate Batch 2 |
| 8-10 | Indirect Medium-Low | Flip & Spot Check Temperatures |
| 10-12 | Holding/Resting | Pull at 125-130°F |
Holding the Line: Resting and Serving 50+ Burgers
You've meticulously prepared the patties, mastered your grill zones, and systematically flipped each burger to perfection. But the job isn't done when they leave the grill. The resting phase is absolutely critical for juiciness, and then you need a strategy to hold dozens of burgers at serving temperature without overcooking them. This is where many large events falter, losing all the hard-earned juiciness and doneness.
The Critical Role of Resting for Juiciness
Just like any cooked meat, burgers need to rest. When meat cooks, the muscle fibers contract, pushing juices to the center. Resting allows these fibers to relax, redistributing those precious juices throughout the patty. If you cut into a burger immediately, all that flavorful juice will gush out onto your plate, leaving you with a drier burger. For 6-ounce patties, I recommend a 5-7 minute rest. This also allows for crucial carryover cooking, bringing your 125-130°F (52-54°C) pulled burgers up to the ideal 130-135°F (54-57°C) for medium-rare.
Batch Cooking and Holding Strategies
When cooking 50+ burgers, you'll inevitably be cooking in batches. You need a way to keep the earlier batches warm without continuing to cook them. My go-to method involves a wire rack set over a baking sheet, tented loosely with foil. The rack keeps the bottom from getting soggy, and the foil traps heat. For even larger quantities or longer holding times, a low-temperature oven (around 170-200°F / 77-93°C) can be used, but be extremely careful as even low heat can slowly continue cooking the burgers. Monitor internal temperatures if using an oven for holding. According to J. Kenji López-Alt of Serious Eats, resting is non-negotiable for juicy results.
Food Safety Considerations for Large Batches
Food safety is paramount, especially when serving large groups. While we're aiming for medium-rare, it's crucial to understand the risks. The USDA recommends ground beef be cooked to 160°F (71°C) for safety. However, many experienced chefs and home cooks safely enjoy medium-rare burgers knowing the source of their ground beef and proper handling. If serving to vulnerable populations (elderly, very young, immunocompromised), always cook to 160°F. For medium-rare, ensure your beef is from a reputable source and handled hygienically. Always wash hands and sanitize surfaces. The USDA provides comprehensive guidelines on ground beef safety.
- Prepare Resting Station: Set up your wire racks and baking sheets, ready to receive cooked burgers.
- Tent Loosely: As soon as burgers are pulled, transfer them to the rack and tent loosely with foil.
- Monitor Holding Temps: If using a low oven, use a probe thermometer to ensure burgers don't exceed 140°F (60°C) to prevent further cooking, but also stay above 135°F (57°C) for safety.
- Serve Promptly: While holding helps, the best burger is one served after a short, proper rest.

Advanced Tactics: Prep, Staff, and Workflow Efficiency
Grilling 50+ burgers consistently to medium-rare isn't just about individual technique; it's about managing a mini-operation. To truly master the challenge, you need to think like a professional kitchen manager. This involves meticulous preparation, smart delegation, and a streamlined workflow. This is where my decades of experience truly shine, transforming potential chaos into culinary choreography.
Mis en Place for a Large Cookout
The French culinary term 'mis en place' (everything in its place) is your mantra. Before the first patty hits the grill, every single ingredient and tool should be ready and organized. This includes: pre-formed patties, seasoned and chilled; buns ready to toast; cheeses sliced; toppings prepped and arranged; condiments accessible; grill tools clean and at hand; thermometers calibrated; and your resting station set up. A well-organized workspace reduces stress, saves time, and prevents costly mistakes when the heat is on.
Delegating Tasks: The Pit Crew Approach
You are the orchestrator, but you don't have to be a one-person show. Enlist help and delegate specific roles, much like a pit crew in a race. One person can be solely responsible for bringing patties to the grill and managing the searing zone. Another can handle the indirect cooking, flipping, and rotating. A third can be on 'temp check' duty, pulling burgers at precisely the right moment. Someone else can manage the resting station and bun toasting. Clear roles minimize confusion and maximize efficiency. As Harvard Business Review often emphasizes, effective delegation and teamwork are critical for scaling success.
Pre-cooking & Finishing Strategies (with caveats)
For truly massive events (hundreds of burgers), you might consider a pre-cooking strategy, but it requires careful execution to maintain medium-rare doneness. One method is to cook burgers to about 110°F (43°C) in advance, chill them rapidly, and then finish them on a hot grill to 125-130°F (52-54°C) just before serving. This is a delicate balance and not for the faint of heart, as it risks drying out the burgers or overcooking them during the finish. I personally prefer to cook them fresh from start to finish, relying on the efficiency of my system, but it's an option for extreme volume if you're an expert.
“Preparation isn't just about ingredients; it's about anticipating every step, every movement, and having a plan for every contingency. That's the difference between a good grill master and a legendary one.”
Troubleshooting Common Pitfalls & Achieving Consistency
Even with the best planning, grilling for a crowd can throw curveballs. Identifying and addressing these common issues quickly is key to maintaining consistency and ensuring every burger is medium-rare perfection. I've seen these problems countless times, and I've developed quick fixes to keep the operation smooth.
Uneven Patty Thickness
This is the silent killer of consistency. If some patties are 1/2 inch thick and others are 1 inch, they will cook at vastly different rates. The thinner ones will be well-done before the thicker ones reach medium-rare. The solution is rigorous pre-grill preparation. If you spot an uneven patty on the grill, you have two options: either pull it earlier if it's thinner (and risk a slightly different doneness level for that burger) or gently press down on the thicker parts with a sturdy spatula to even it out *early in the cooking process*, being careful not to squeeze out juices. This is a last resort; ideally, consistency starts with the patty press.
Grill Hot Spots
Every grill has them, even commercial-grade ones. These are areas that consistently run hotter than others. If you don't account for them, burgers in these spots will cook faster and likely overcook. Use your grill surface thermometer to map your hot spots before you even start cooking. Then, use these areas strategically for initial searing, or avoid them for the slower, indirect cooking phase. Rotate burgers out of hot spots more frequently, or assign them to the 'well-done' pile if you have guests who prefer that doneness. Meathead Goldwyn of AmazingRibs.com provides excellent guides on understanding grill temperatures and zones.
Overcrowding the Grill
This is perhaps the most common mistake. Trying to squeeze too many burgers onto the grill at once drops the overall grill temperature dramatically, especially in the direct heat zone. It also inhibits proper air circulation, leading to steaming rather than searing, and makes it impossible to flip and rotate effectively. You end up with gray, under-seared, inconsistently cooked burgers. The solution is discipline: cook in manageable batches. Give each burger space. If your grill can only comfortably hold 15 burgers, then cook 15 at a time, even if it means more rounds. Quality over quantity, always.
| Problem | Root Cause | Solution |
|---|---|---|
| Uneven Patty Doneness | Inconsistent Patty Thickness | Use a kitchen scale and burger press for uniform patties. Spot-check and adjust thickness pre-grill. |
| Burgers Cooking Too Fast/Slow | Unidentified Grill Hot/Cold Spots | Map grill with a surface thermometer. Rotate burgers frequently, moving from hotter to cooler zones as needed. |
| Lack of Good Sear/Gray Exterior | Overcrowding the Grill | Cook in smaller batches, ensuring ample space between burgers to maintain grill temperature and promote searing. |
| Dry Burgers | Overcooking or Insufficient Resting | Use a thermometer religiously, pull at 125-130°F (52-54°C), and always allow 5-7 minutes of tented resting. |
| Burgers Sticking to Grates | Dirty Grates or Insufficient Oil | Always clean grates thoroughly with a wire brush before preheating, then oil lightly with a high smoke point oil. |

Ingredient Quality & Seasoning: Elevating the Burger Experience
While technique is king for consistency, the quality of your ingredients and the simplicity of your seasoning are what truly elevate a burger from good to unforgettable. When you're cooking 50+ burgers, you don't need fancy additions; you need excellent fundamentals that shine through in every bite. This is about respecting the meat and enhancing its natural flavors.
The Impact of Ground Beef Quality
As I mentioned earlier, 80/20 ground chuck is my gold standard for burgers. The 'chuck' cut provides a rich, beefy flavor, and the 20% fat content ensures juiciness and flavor. Don't skimp on quality here. Source your beef from a reputable butcher. Freshly ground beef makes a noticeable difference compared to pre-packaged options that might have been sitting around. A good quality beef means you don't have to mask flavors with excessive seasoning.
Simple, Effective Seasoning for Volume
When cooking dozens of burgers, complexity is your enemy. You want seasoning that enhances, not overpowers. My go-to is incredibly simple: kosher salt and freshly cracked black pepper. That's it. Season generously on both sides of the patty just before it hits the grill. The salt helps draw out moisture to create a better sear (which then reabsorbs), and the pepper adds a classic bite. Avoid seasoning too far in advance, as salt can start to cure the meat, changing its texture. You want that fresh, robust beef flavor to be the star.
Cheese Application for Large Batches
Cheese is a non-negotiable for many, and getting it right on 50+ burgers requires a little finessing. I prefer American cheese for its melting properties and classic flavor, but sharp cheddar or provolone also work well. Place the cheese slice on the burger during the last minute or two of cooking on the indirect heat zone. Close the grill lid to create a mini 'oven' effect, allowing the cheese to melt perfectly without burning the burger. For very large batches, you might have a dedicated 'cheese station' where burgers are moved just before serving, covered with cheese, and then briefly put under a cloche or in a low-temp holding oven to melt.
- Source High-Quality Beef: Prioritize 80/20 ground chuck from a trusted butcher.
- Season Just Before Grilling: Generously apply kosher salt and fresh black pepper to both sides of the patties right before they go on the hot grill.
- Strategic Cheese Melt: Add cheese to burgers during the final 1-2 minutes of cooking on indirect heat, closing the lid to melt evenly.
Frequently Asked Questions (FAQ)
Question? How do I manage different doneness requests for a large group when aiming for medium-rare?
Detailed answer: This is a common challenge. My strategy is to prioritize medium-rare as the default and then use the hotter zones of the grill, or slightly longer cook times, for those who prefer medium-well or well-done. Assign a specific section of your indirect zone for these longer-cooking burgers. Use your multi-probe thermometer to track them separately. For rare, you'd simply pull them earlier, around 120°F (49°C). Communication is key; have a system to mark or separate these burgers once cooked.
Question? What's the best way to keep burgers warm without overcooking them once they're off the grill?
Detailed answer: The best method is to use a wire rack set over a baking sheet, tented loosely with aluminum foil. This allows air circulation to prevent sogginess while trapping heat. For holding longer, a low oven set to 170-200°F (77-93°C) can work, but you must monitor internal temperatures with a probe thermometer. Burgers should ideally not exceed 140°F (60°C) to prevent further cooking, but stay above 135°F (57°C) for food safety. Avoid stacking hot burgers directly, as this will trap steam and ruin the crust.
Question? Can I really achieve medium-rare on a charcoal grill for 50+ burgers, or is gas easier for volume?
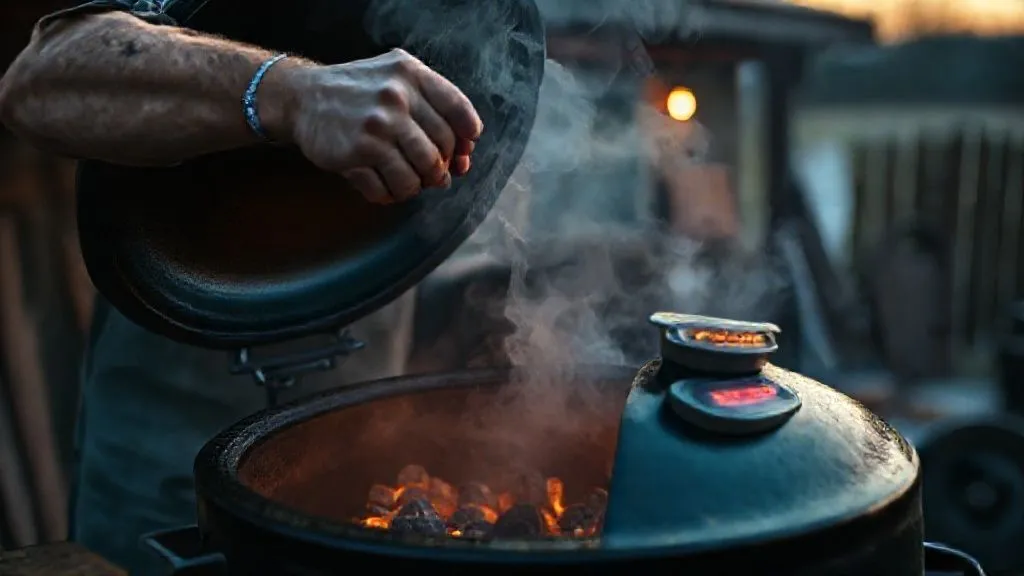
Detailed answer: Absolutely, you can achieve medium-rare on a charcoal grill for 50+ burgers, and many argue it provides superior flavor. It requires more active management of your coals to create and maintain your two-zone setup. Bank most of your coals to one side for direct searing, leaving fewer or no coals on the other side for indirect finishing. You might need to add fresh coals periodically to maintain heat over a long cook. While gas offers more consistent heat control at the turn of a knob, a well-managed charcoal grill is perfectly capable of high-volume, consistent results.
Question? What's the ideal internal temperature for medium-rare, considering carryover cooking?
Detailed answer: For medium-rare, I consistently pull my burgers off the grill when they reach an internal temperature of 125-130°F (52-54°C). This accounts for carryover cooking, where the burger's internal temperature will continue to rise by 5-10 degrees Fahrenheit (3-6 degrees Celsius) while it rests. After a 5-7 minute rest, the burger will settle into the perfect medium-rare range of 130-135°F (54-57°C), juicy and pink throughout.
Question? How do I prevent burgers from drying out on the grill when cooking so many?
Detailed answer: Preventing dry burgers boils down to a few critical factors: start with 80/20 ground beef (fat equals moisture), don't overwork the meat when forming patties, avoid pressing down on burgers with a spatula while grilling (which squeezes out juices), and most importantly, use a thermometer and pull them off the grill at the precise internal temperature of 125-130°F (52-54°C). Finally, always allow them to rest for 5-7 minutes; this allows juices to redistribute, leading to a much juicier burger.
Key Takeaways and Final Thoughts
- Patty Perfection: Start with consistent 6oz, 3/4-inch, dimpled patties of 80/20 ground chuck.
- Thermometer is King: Use instant-read and multi-probe thermometers for precise temperature control, pulling at 125-130°F (52-54°C).
- Two-Zone Mastery: Implement direct and indirect heat zones for searing and gentle finishing.
- Systematic Flipping: Adopt a disciplined flip-and-rotate strategy every 1-2 minutes for even cooking.
- Rest and Hold: Allow 5-7 minutes of tented resting and use wire racks to hold burgers without overcooking.
- Prep and Delegate: Utilize 'mis en place' and a 'pit crew' approach for workflow efficiency.
- Quality & Simplicity: Rely on high-quality beef and simple seasoning (salt & pepper) to let the flavor shine.
Mastering the art of grilling 50+ burgers to consistent medium-rare perfection is not a mystic skill; it's a science, a system, and a discipline. By applying these battle-tested strategies – from meticulous patty preparation to precise temperature control and an efficient workflow – you’re not just cooking burgers; you’re orchestrating a culinary triumph. Embrace the tools, trust the process, and you’ll transform your next large cookout into a legendary display of grilling prowess, delivering perfectly juicy, medium-rare burgers to every guest, every time. Now go forth, and grill with confidence!
Recommended Reading
- How to Sharpen Team's Foundational Skills for Efficiency: 7 Proven Strategies
- Thicken Caramel Now! How to Thicken Homemade Caramel Sauce Fast
- 7 Pro Tips: Stop Royal Icing Bleed & Cracks on Bulk Cookie Orders
- Mastering Tart Shells: 7 Pro Tips to Halt Excessive Shrinking
- 5 Strategies to Streamline One-Pot Weeknight Dinners for Efficiency
0 Comentários: