 By
By 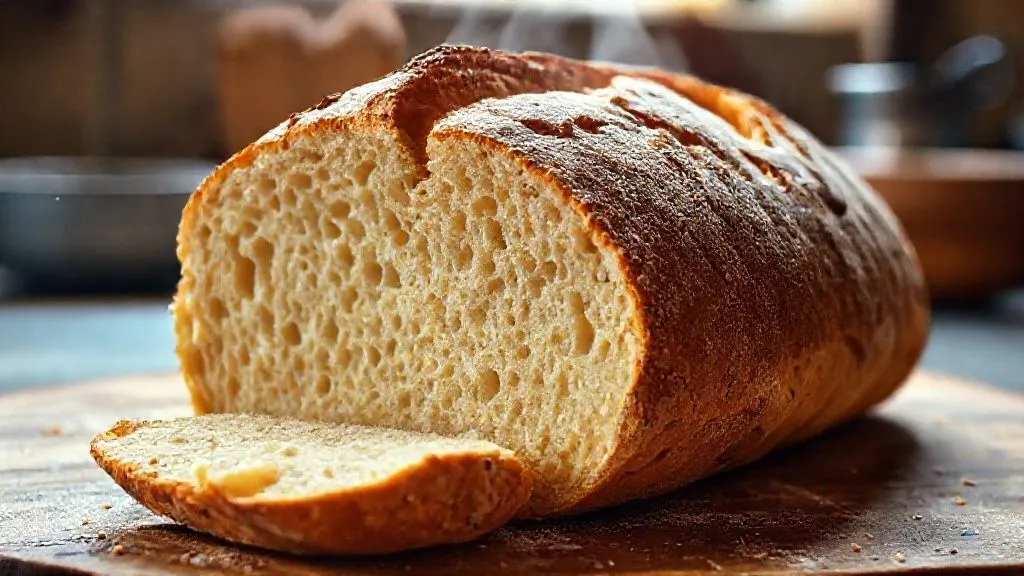
How to achieve perfect open crumb in high hydration no knead bread?
For over two decades in the world of bread baking, I've witnessed countless bakers, both novice and seasoned, grapple with the allure and frustration of high hydration no-knead bread. It promises simplicity, but delivering that ethereal, open crumb – the hallmark of a truly great loaf – often feels like chasing a mythical beast. I remember my own early days, pulling a seemingly perfect loaf from the oven, only to slice into a dense, uniform interior. It was disheartening, a stark contrast to the airy, irregular beauty I envisioned.
This struggle is incredibly common. Bakers often find their high hydration no-knead doughs are sticky, difficult to handle, and ultimately yield a crumb that's tighter than desired, lacking those beautiful, irregular pockets of air. The promise of a 'no-knead' method sometimes leads to overlooking crucial, gentle manipulations and environmental controls that are absolutely vital for developing the gluten structure needed for that coveted open crumb.
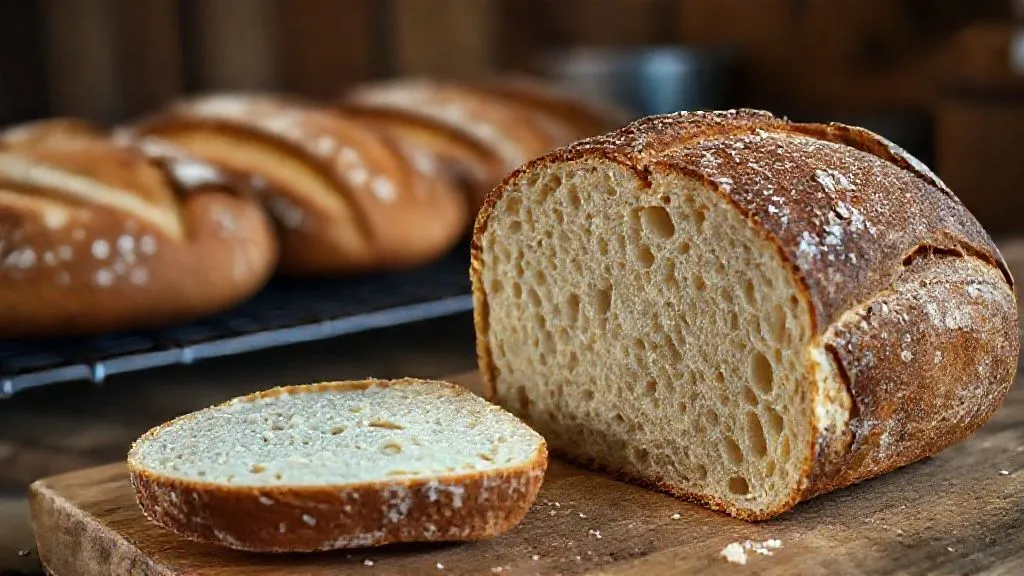
But I'm here to tell you, achieving that perfect open crumb is not a matter of luck; it's a science, an art, and a series of deliberate, actionable steps. In this definitive guide, I'll walk you through the precise techniques, from understanding your ingredients to mastering the bake, that will transform your high hydration no-knead bread from merely good to truly spectacular. We'll explore the often-misunderstood nuances of gluten development, proofing, shaping, and baking environment, providing you with a robust framework to consistently produce loaves with an irresistible, airy interior.
Understanding Hydration and Gluten Development
High hydration in bread dough, typically above 75%, is the foundation for an open crumb. More water allows for greater extensibility of the gluten network, leading to larger, more irregular air pockets. However, this extra water also makes the dough stickier and harder to manage, demanding a different approach to gluten development than traditional kneading.
In no-knead bread, we rely on time and gentle manipulation to build strength in the dough. This passive gluten development is incredibly effective, provided we give it the right conditions and a little assistance.
The Importance of Autolyse
The autolyse step, often overlooked in simpler no-knead recipes, is a game-changer for high hydration doughs. It involves mixing just the flour and water, allowing them to rest for 30 minutes to an hour before adding salt and yeast/starter. This simple rest period allows the flour to fully hydrate and enzymes to begin breaking down proteins, kickstarting gluten development without any mechanical effort.
During autolyse, the glutenin and gliadin proteins in the flour naturally begin to bond, forming preliminary gluten strands. This process also improves the dough's extensibility, making it easier to handle and fold later, and ultimately contributing to a more open crumb.
Gentle Stretch and Folds: Building the Network
While 'no-knead' implies hands-off, high hydration doughs benefit immensely from a series of gentle stretch and folds during the bulk fermentation. These aren't vigorous kneading; rather, they are careful manipulations that strengthen the gluten network without degassing the dough excessively. I've found that 3-4 sets of folds, spaced 30-45 minutes apart, are optimal.
- Wet your hands: This prevents sticking and makes handling high hydration dough much easier.
- Grab the dough: Reach under the dough, grab a section, and gently stretch it upwards.
- Fold it over: Fold the stretched dough over itself towards the center of the bowl.
- Rotate the bowl: Give the bowl a quarter turn and repeat the stretch and fold process 3-4 more times, until you've worked your way around the entire dough.
- Rest: Cover the bowl and let the dough rest for another 30-45 minutes before the next set.
This systematic, gentle handling during bulk fermentation is crucial for organizing the gluten strands into a strong, elastic network capable of trapping the gases produced by fermentation, leading to those desirable large holes.

The Critical Role of Proofing
Proofing, or fermentation, is where the magic truly happens. It's the process by which yeast consumes sugars and produces carbon dioxide gas, creating the internal structure of the bread. For an open crumb, we need a balance: enough fermentation to create gas, but not so much that the gluten structure collapses.
First Proof: Bulk Fermentation Mastery
Bulk fermentation, the first rise, is arguably the most important stage for crumb development. This is where the majority of gas production occurs and the gluten network is fully established. The duration and temperature of this stage are critical. In my experience, a longer, slower bulk fermentation at a slightly cooler room temperature (around 70-72°F or 21-22°C) yields a more complex flavor and a more robust, extensible gluten structure.
Look for visual cues: the dough should increase significantly in volume (often 50-100% depending on hydration and flour), have a domed surface, and show signs of gas bubbles on the surface. It should also feel light and airy when gently jiggled. Under-proofed dough will be dense, while over-proofed dough will struggle to hold its shape and collapse in the oven.
Second Proof: The Power of Cold Retardation
After initial shaping, I always recommend a cold proof (or cold retardation) in the refrigerator for at least 12-18 hours, and up to 24 hours. This serves multiple purposes: it slows down fermentation, allowing enzymes more time to break down starches into sugars for deeper flavor, and it firms up the dough, making it much easier to handle and score before baking.
Crucially, cold proofing also strengthens the gluten network further, making it more resilient to the oven's heat and promoting a more dramatic oven spring, which is essential for that wide-open crumb. The slow, steady production of gas in the cold environment creates smaller, more uniform bubbles initially, which then expand dramatically when exposed to high heat.
Case Study: The Baker's Dozen Bakery's Crumb Transformation
The Baker's Dozen Bakery, a local artisan shop, faced a common dilemma: their popular no-knead sourdough loaves, while flavorful, consistently had a tighter, more uniform crumb than desired. Their customers loved the taste but often commented on the lack of "airy holes." Working with their head baker, I identified that their bulk fermentation was often rushed (around 4 hours at 78°F) and they skipped cold proofing entirely, going straight from shaping to baking.
We implemented a revised proofing schedule: a longer, cooler bulk fermentation (6-8 hours at 72°F), followed by a 16-hour cold proof in the refrigerator. The initial resistance was due to the added time, but the results were undeniable. Their loaves developed a noticeably lighter texture, a more complex tangy flavor, and, most importantly, a dramatically more open and irregular crumb. Customer feedback immediately shifted, praising the 'lightness' and 'beautiful holes' in the bread. This simple shift in proofing strategy not only elevated their bread quality but also allowed for greater flexibility in their baking schedule.
This case study underscores that patience in proofing is not a luxury; it's a necessity for achieving the desired open crumb structure in high hydration no-knead bread.
Mastering the Shaping Technique
Shaping a high hydration dough can feel intimidating due to its stickiness and slackness. However, proper shaping is paramount for building the surface tension necessary to trap gases and create a beautiful oven spring, both of which are critical for an open crumb. Without adequate tension, your dough will spread rather than rise, leading to a flatter loaf with a denser crumb.
Pre-shaping for Initial Tension
After bulk fermentation, gently scrape your dough onto a lightly floured surface. Resist the urge to add too much flour, as this can dry out the crust. The goal of pre-shaping is to create an initial round or oval, establishing some surface tension without degassing the dough too much. Gently fold the edges towards the center, then flip it seam-side down and let it rest for 20-30 minutes. This 'bench rest' allows the gluten to relax, making the final shaping easier and preventing tearing.
Final Shaping: Building Structure and Sealing the Deal
The final shaping is where you build the structural integrity of your loaf. For high hydration doughs, I typically use a method that creates maximum surface tension. This often involves a series of folds and tucks that pull the dough taut on the outside, creating a 'skin' that will expand dramatically in the oven. The key is to work quickly and confidently, minimizing contact with the sticky interior.
For a boule (round loaf), gently gather the dough into a taut ball, sealing the seam at the bottom. For a batard (oval loaf), roll it into a cylinder, again ensuring a tight seam. Always transfer your shaped dough seam-side up into a well-floured banneton or a bowl lined with a floured cloth. This prevents sticking and helps maintain its shape during the cold proof. According to culinary scientist Harold McGee, the integrity of the surface tension is what allows the dough to capture and hold the expanding gases, much like a balloon.

Baking Environment: Heat and Steam are Key
The moment your dough hits the oven is crucial. For an open crumb, you need two things: extremely high initial heat and plenty of steam. These elements work in tandem to maximize oven spring and prevent the crust from setting too early, allowing the internal structure to expand fully.
"Achieving a truly open crumb isn't just about the dough; it's about creating a microclimate in your oven that allows the bread to expand unhindered, a brief sauna for your loaf before it crisps." - Expert Insight
The Dutch Oven Advantage
I cannot overstate the importance of baking in a preheated Dutch oven or a similar lidded vessel. Preheating the Dutch oven to a very high temperature (typically 450-500°F or 230-260°C) provides an intense burst of initial heat that rapidly expands the gases within the dough, leading to a dramatic oven spring. This is the primary driver for those large, irregular air pockets.
The lid of the Dutch oven traps the moisture released by the dough as it bakes, creating a steamy environment around the loaf. This steam keeps the crust soft and pliable for the first 20-30 minutes of baking, preventing it from hardening prematurely. If the crust sets too soon, the dough's expansion will be restricted, resulting in a denser crumb. After this initial period, removing the lid allows the crust to brown and crisp up beautifully.
Achieving Optimal Steam (Even Without a Dutch Oven)
If you don't have a Dutch oven, you can still create a steamy environment, though it requires a bit more effort. Preheat your oven with a baking steel or stone and a cast iron pan or broiler tray on the bottom rack. Just before loading your bread, carefully pour a cup of boiling water into the hot pan. This will create a burst of steam. Be cautious when doing this to avoid burns.
Some bakers also mist the inside of their oven with a spray bottle, but this method is less effective and can cool the oven significantly. The goal is to keep the crust moist and extensible during the initial phase of baking, facilitating maximum expansion. As food writer Michael Pollan eloquently put it, 'Cooking is not just about following recipes; it's about understanding the principles at play.'

Flour Choice and Starter Activity
While technique is paramount, the quality of your ingredients, especially flour and your leavening agent, plays a foundational role in achieving that coveted open crumb. Garbage in, garbage out, as the old saying goes.
High-Protein Flours for Strength
For high hydration no-knead bread, I strongly advocate for using high-protein bread flour (typically 12-14% protein content). The higher protein content means more gluten-forming proteins (glutenin and gliadin), which are essential for building a strong, elastic network capable of stretching and holding those large gas bubbles. All-purpose flour, with its lower protein content, will struggle to develop the necessary strength for a truly open crumb with high hydration.
Some bakers even experiment with a small percentage of whole wheat flour (5-10%) for flavor and added enzymatic activity, but be mindful that whole wheat can also inhibit gluten development due to the sharp bran particles. It's a balance.
Active Starter or Yeast: The Engine of Expansion
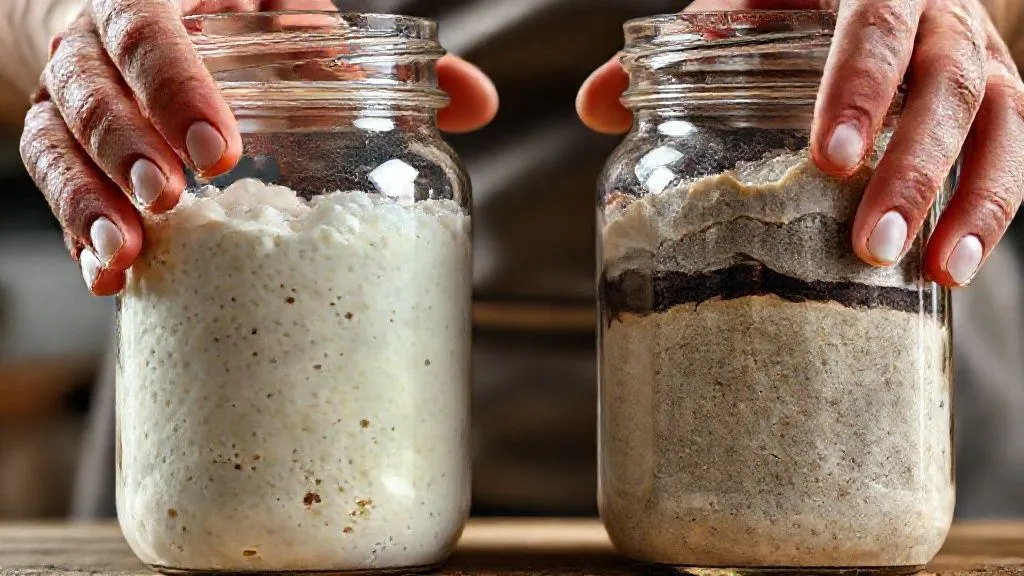
Whether you're using commercial yeast or a sourdough starter, its activity level is non-negotiable for an open crumb. A sluggish starter or old, inactive yeast won't produce enough gas to adequately leaven your high hydration dough, resulting in a dense, tight crumb. For sourdough, ensure your starter is robust, bubbly, and passes the 'float test' before mixing your dough.
If using commercial yeast, always check the expiration date and bloom it in warm water with a pinch of sugar to confirm its vitality. A strong, active leavening agent is the engine that drives the expansion, and without a powerful engine, your bread simply won't rise to its full potential.
Troubleshooting Common Crumb Issues
Even with the best intentions, things can sometimes go awry. Understanding common pitfalls and how to diagnose them is a crucial skill for any baker aiming for that perfect open crumb.
| Problem | Likely Cause | Solution |
|---|---|---|
| Dense, tight crumb with small, uniform holes | Under-proofed dough, weak gluten development, insufficient steam, low protein flour | Increase bulk fermentation time, add more stretch & folds, ensure active starter/yeast, use Dutch oven/steam method, switch to high-protein bread flour |
| Crumb is gummy or sticky, even after cooling | Underbaked bread, excessive hydration, improper cooling | Increase baking time, ensure internal temperature reaches 200-210°F, slightly reduce hydration, cool completely before slicing |
| Large tunnels or voids, but overall crumb is dense | Over-proofed dough, inconsistent shaping, aggressive handling | Reduce proofing time, gentle handling during shaping, ensure even tension across the dough |
| Crust is hard and thick, but crumb is okay | Lack of steam during initial bake, oven too hot | Ensure adequate steam in the oven (Dutch oven or water pan), reduce oven temperature slightly if crust burns too quickly |
| Loaf spreads flat, no oven spring | Over-proofed dough, weak gluten structure, poor shaping (lack of surface tension) | Reduce proofing time, more stretch & folds, focus on building strong surface tension during final shaping |
By systematically evaluating these common issues, you can pinpoint the areas in your process that need adjustment and move closer to your perfect loaf. It’s an iterative process of learning and refinement.
The Art of Scoring
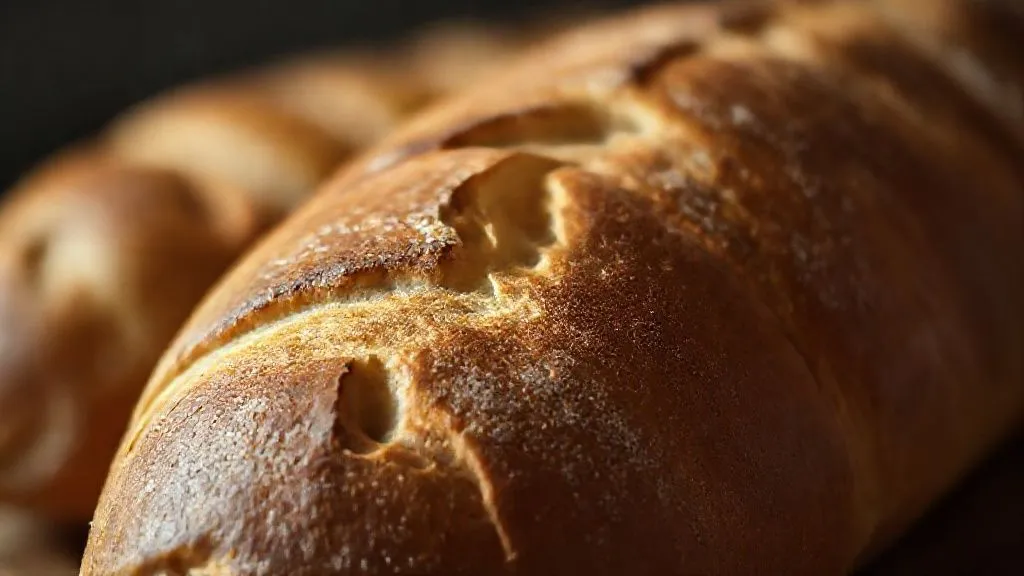
Scoring, or slashing the top of your dough just before baking, isn't just for aesthetics; it's a functional technique vital for controlling oven spring and achieving an open crumb. When a loaf is placed in a hot oven, it rapidly expands. Without a score, the crust will rupture wherever it finds the path of least resistance, often resulting in an uncontrolled burst and a less appealing shape.
A well-placed score acts as a guide, directing the dough's expansion. For an open crumb, you generally want a deep, confident cut (about 1/2 to 3/4 inch deep) that allows for maximum expansion. A single, long slash down the middle or a simple cross pattern are common for boules and batards. Use a very sharp razor blade (lame) or a sharp knife, and work quickly to avoid dragging the dough.
The angle of your score also matters. A shallow, angled score will create a 'ear' – a beautiful flap of crust – while a deeper, more vertical score encourages a broader, more even expansion. Experiment to see what works best with your dough and desired aesthetic, but always prioritize function for that internal openness.

Cooling: The Often-Overlooked Step
You've successfully baked your beautiful loaf with an incredible open crumb. The aroma is intoxicating, and the temptation to slice into it immediately is almost unbearable. But wait! The cooling process is just as crucial as any other step for the final texture and flavor of your bread.
When bread comes out of the oven, it's still cooking. The internal temperature is very high, and moisture is still migrating. Slicing into a hot loaf traps this moisture, leading to a gummy, dense texture, even if your crumb structure was perfect. It also prevents the starches from fully setting, which is essential for that light, airy mouthfeel.
Always cool your bread completely on a wire rack for at least 2-3 hours, or even longer for very large loaves. This allows residual heat to escape, moisture to redistribute, and the crumb to set properly. Patience at this final stage is truly a virtue, ensuring that all your hard work translates into the perfect eating experience. As food scientist Shirley Corriher explains, 'Cooling bread allows the starches to crystallize, which firms up the crumb and prevents it from being gummy.' For more on the science of cooling, check out this article on King Arthur Baking.
Frequently Asked Questions (FAQ)
Q: Can I achieve an open crumb with lower hydration no-knead bread? A: While possible, it's significantly more challenging. Lower hydration doughs inherently have a tighter gluten network and less extensibility, making it harder to create those large, irregular air pockets. High hydration (75%+) is generally preferred for a truly open crumb. You might achieve a 'light' crumb, but not the dramatic openness of a high hydration loaf.
Q: My dough is too sticky to handle. What am I doing wrong? A: Stickiness is normal for high hydration dough! Ensure your hands are wet when performing stretch and folds or shaping. Avoid adding excessive flour to your work surface, as this can dry out the dough. If it's truly unmanageable, your hydration might be too high for your flour's absorption capacity, or your gluten development is insufficient. Try reducing water by 1-2% next time, or add an extra set of stretch and folds.
Q: How do I know if my dough is properly proofed for an open crumb? A: For bulk fermentation, look for a significant increase in volume (50-100%), a domed top, and visible gas bubbles. The 'poke test' can also help: gently poke the dough with a wet finger; if it springs back slowly but leaves a slight indentation, it's likely ready. If it springs back immediately, it's under-proofed; if it collapses, it's over-proofed. During cold proofing, the dough should feel firm but still have some give.
Q: Is using a sourdough starter better for an open crumb than commercial yeast? A: Sourdough starters often contribute to a more complex flavor and can lead to a very open crumb due to their unique enzymatic activity and the longer fermentation times involved. However, commercial yeast, when used correctly in a high hydration no-knead recipe with proper gluten development and baking techniques, can absolutely produce a fantastic open crumb. The key is consistent activity from your leavening agent.
Q: Why is my bread crust burning before the inside is fully cooked? A: This often indicates your oven temperature is too high or your bread is baking too close to the heating element. Ensure your Dutch oven is preheated, but consider reducing the oven temperature by 25°F (15°C) after the first 20-30 minutes of covered baking. Also, ensure your loaf is not directly touching the sides or top of the Dutch oven. A longer covered bake can also help prevent premature crust browning.
Key Takeaways and Final Thoughts
Achieving that perfect open crumb in high hydration no-knead bread is a deeply rewarding endeavor, transforming a simple loaf into a masterpiece of texture and flavor. It’s a journey that combines scientific understanding with intuitive baking, patience with precision. Here are the critical takeaways to remember:
- Embrace Hydration, But Develop Gluten: High water content is key, but it demands gentle, consistent stretch and folds and the power of autolyse to build a strong, extensible gluten network.
- Master the Proofing Dance: A thoughtful bulk fermentation and a patient cold retardation are non-negotiable for flavor development and a resilient structure ready for expansion.
- Shape with Intent: Surface tension is your best friend. Learn to shape quickly and effectively to create a taut 'skin' that will guide your oven spring.
- Heat and Steam are Your Allies: A screaming hot Dutch oven and ample steam during the initial bake are crucial for maximizing oven spring and preventing premature crust setting.
- Quality Ingredients Matter: High-protein flour and an active leavening agent provide the foundational strength and lift your dough needs.
- Patience is a Virtue: From fermentation to the final cooling, rushing any step compromises the final result.
I've seen countless bakers achieve truly stunning results by applying these principles. Don't be discouraged by initial failures; each loaf is a learning opportunity. By understanding the 'why' behind each step and diligently applying these expert techniques, you'll soon be consistently pulling loaves from your oven that boast that coveted, airy, and utterly delicious open crumb. Happy baking, and may your loaves always be light and full of character!
For further reading on the science of bread baking, I highly recommend "Flour Water Salt Yeast" by Ken Forkish, which delves into these concepts in great detail. Also, explore resources from The Perfect Loaf for advanced sourdough techniques, and Sourdough.co.uk for a deeper dive into starter maintenance and high hydration baking.
Recommended Reading
- 5 Strategies: Adapting When Rare Gourmet Ingredients Vanish?
- Dairy-Free Desserts: 5 Pro Methods to Prevent Gritty Texture
- Unlock Weight Loss: 7 Low-Calorie Seafood Recipes Revealed!
- 7 Steps: Motivate Reluctant Kids to Cook & Eat Diverse Healthy Foods
- Eliminate Tart Shell Shrinkage: 7 Proven Steps for Production Runs

0 Comentários: